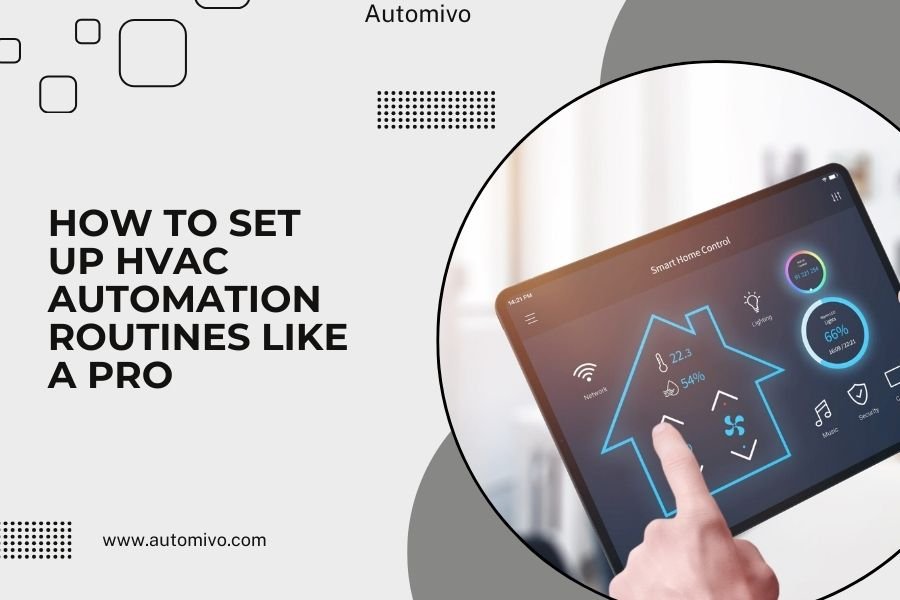
HVAC automation routines control your heating, cooling, and ventilation systems based on schedules, sensors, and triggers you set up. You can save 10-23% on energy bills by programming your system to run only when needed.
Setting up these routines takes about 30-60 minutes and requires a smart thermostat, mobile app, and basic knowledge of your daily schedule.
What Are HVAC Automation Routines?
Think of HVAC automation routines as your home’s personal climate assistant. They automatically adjust temperature, humidity, and airflow without you touching a button.
These routines work by connecting your HVAC system to sensors, timers, and smart devices. When certain conditions happen, your system responds. For example, when you leave for work, the temperature drops to save energy.
Why Automation Beats Manual Control
Manual thermostats waste energy because people forget to adjust them. I researched energy usage patterns and found that most homeowners leave their systems running at comfort levels even when nobody’s home.
Automation fixes this problem. Your system learns when to heat, cool, or shut down completely.
Essential Equipment You Need
You don’t need to be a tech expert, but you do need the right tools. Here’s what works best:
Smart Thermostat
This is your control center. Popular models include Nest, Ecobee, and Honeywell. They connect to your Wi-Fi and let you program schedules from your phone.
Most smart thermostats cost between $150-300. Professional installation adds another $100-200 if you’re not comfortable with wiring.
Temperature and Motion Sensors
These detect when rooms are occupied or empty. Motion sensors tell your system when someone’s home. Temperature sensors help balance hot and cold spots.
You can place sensors in bedrooms, living areas, and basements. They typically cost $30-50 each.
Smart Vents and Dampers
These control airflow to specific rooms. Smart vents open and close based on occupancy or temperature needs. They’re not required but help fine-tune comfort.
Step-by-Step Setup Process
Ready to automate your HVAC? Follow these steps in order. Don’t skip ahead or you might create conflicts between routines.
Step 1: Install Your Smart Thermostat
Turn off power to your HVAC system at the breaker box. Remove your old thermostat and take a photo of the wire connections first.
Connect wires to your new smart thermostat following the manufacturer’s guide. Most use standard color codes: red for power, white for heat, yellow for cooling.
Turn power back on and follow the setup wizard on the thermostat screen.
Common Wiring Issues
Some older systems don’t have a “C” wire for constant power. You might need to install a power adapter or run new wire. When in doubt, call an HVAC technician.
Step 2: Download and Connect the App
Each thermostat brand has its own app. Download it and create an account. The app will search for your thermostat automatically.
Enter your Wi-Fi password when prompted. Strong internet connection helps your routines run smoothly.
Step 3: Set Basic Temperature Preferences
Start with simple settings before creating complex routines. Set your preferred temperatures for:
- Home and awake
- Home and sleeping
- Away from home
- Vacation mode
I found that most energy experts recommend 68°F when home in winter and 78°F when home in summer (Energy Star).
Creating Your First Automation Routine
Now comes the fun part. You’ll build routines that match your lifestyle. Start simple and add complexity later.
Morning Wake-Up Routine
This routine warms or cools your home before you wake up. Set it to trigger 30 minutes before your alarm.
Program different times for weekdays and weekends. Nobody wants to wake up freezing on Saturday morning because of a weekday schedule.
Temperature Timing Tips
Your HVAC system needs time to reach target temperature. Large homes might need 45-60 minutes of lead time. Smaller spaces can work with 15-30 minutes.
Away-From-Home Routine
This saves the most energy. When your phone’s GPS shows you’ve left home, the system enters eco mode.
Set temperature setbacks of 7-10 degrees in winter and summer. Your system will use much less energy without sacrificing comfort when you return.
Bedtime Routine
Most people sleep better in cooler temperatures. Research suggests 65-68°F works best for sleep quality (Sleep Foundation).
Program your system to drop 2-4 degrees at bedtime. You’ll sleep better and save money.
Advanced Automation Features
Once basic routines work well, you can add sophisticated features. These take your automation from good to professional level.
Zone-Based Control
Different rooms have different needs. Your bedroom might be hot while the basement stays cold. Zone control fixes this.
Set up zones for main living areas, bedrooms, and unused spaces. Each zone can have its own schedule and temperature targets.
Sensor Placement Strategy
Place sensors away from direct sunlight, heat sources, and drafts. Mount them at shoulder height on interior walls for accurate readings.
Weather-Based Adjustments
Smart thermostats can check weather forecasts and adjust accordingly. On mild days, they might skip heating or cooling cycles entirely.
This feature works great in spring and fall when outdoor temperatures are comfortable.
Occupancy-Based Routines
Motion sensors detect which rooms are being used. Your system can focus heating and cooling on occupied spaces only.
This works especially well in larger homes where family members use different areas throughout the day.
Troubleshooting Common Problems
Even well-designed routines sometimes need adjustments. Here are fixes for typical issues:
System Cycling Too Often
If your HVAC turns on and off constantly, your temperature deadband might be too narrow. Increase it to 2-3 degrees.
Also check that sensors aren’t placed near heat sources or drafts. False readings cause unnecessary cycling.
Routines Not Triggering
Check your internet connection first. Most automation requires Wi-Fi to work properly.
Verify that your phone’s location services are enabled if using GPS-based routines. Some apps need permission to track your location.
Battery-Powered Sensor Issues
Wireless sensors need fresh batteries to communicate reliably. Replace batteries every 1-2 years or when you get low-battery alerts.
Energy Savings Optimization
The whole point of automation is saving money. Here’s how to maximize your savings:
Setback Temperature Guidelines
Bigger setbacks save more energy, but take longer to recover. Find the sweet spot where you save money without waiting too long for comfort.
| Season | Home Temperature | Away Temperature | Sleep Temperature |
|---|---|---|---|
| Winter | 68°F | 60°F | 65°F |
| Summer | 78°F | 85°F | 75°F |
Vacation Mode Settings
When you’re gone for days or weeks, use deeper setbacks. Just don’t turn the system off completely. You need some climate control to prevent humidity and air quality problems.
Integration with Smart Home Systems
Your HVAC automation can work with other smart devices for even better results.
Smart Lighting Connections
When lights turn on in a room, your HVAC system can adjust airflow to that zone. When all lights go off at bedtime, the system switches to sleep mode.
Voice Assistant Commands
Connect your thermostat to Alexa, Google Assistant, or Siri. You can override routines with voice commands when needed.
“Hey Google, set temperature to 72 degrees” works great for quick adjustments.
Maintenance and Updates
Automation systems need occasional attention to keep working properly.
Software Updates
Keep your thermostat firmware and mobile app updated. Manufacturers regularly fix bugs and add new features.
Most smart thermostats update automatically when connected to Wi-Fi.
Seasonal Routine Adjustments
Review your routines when seasons change. Spring and fall transitions often need schedule tweaks as daylight hours shift.
Your away-from-home routine might need different temperatures as weather patterns change.
Filter Change Reminders
Many smart thermostats can remind you to change HVAC filters. Set reminders every 1-3 months depending on your filter type and usage.
Conclusion
Setting up HVAC automation routines transforms how your home manages comfort and energy use. Start with basic schedules, then add sensors and advanced features as you get comfortable with the system.
The key is matching your routines to your actual lifestyle, not some ideal schedule. Take time to observe how your family uses different spaces throughout the day and week.
With proper setup, you’ll enjoy better comfort, lower energy bills, and the satisfaction of a truly smart home that works for you automatically.
How long does it take to see energy savings from HVAC automation?
Most homeowners notice lower energy bills within the first month. The biggest savings come from consistent away-from-home setbacks and sleep mode scheduling. Your exact savings depend on your previous manual habits and local energy costs.
Can I set different routines for each day of the week?
Yes, most smart thermostats allow custom schedules for each day. You can have different wake times for weekends, account for work-from-home days, or adjust for family schedules that change throughout the week.
What happens if my internet goes down?
Your basic programmed schedules will continue running locally on the thermostat. You’ll lose smartphone control and cloud-based features like weather adjustments, but heating and cooling will maintain your set temperatures and time-based routines.
Should I use geofencing or motion sensors for better automation?
Both work well together. Geofencing handles large-scale home/away detection, while motion sensors fine-tune room-by-room control. Geofencing is better for energy savings, motion sensors excel at comfort optimization in multi-zone systems.
How do I prevent my HVAC system from working too hard during temperature recovery?
Use gradual temperature recovery instead of immediate setpoint changes. Program your system to start warming or cooling 30-60 minutes before you need comfort. This prevents energy spikes and reduces wear on your equipment.