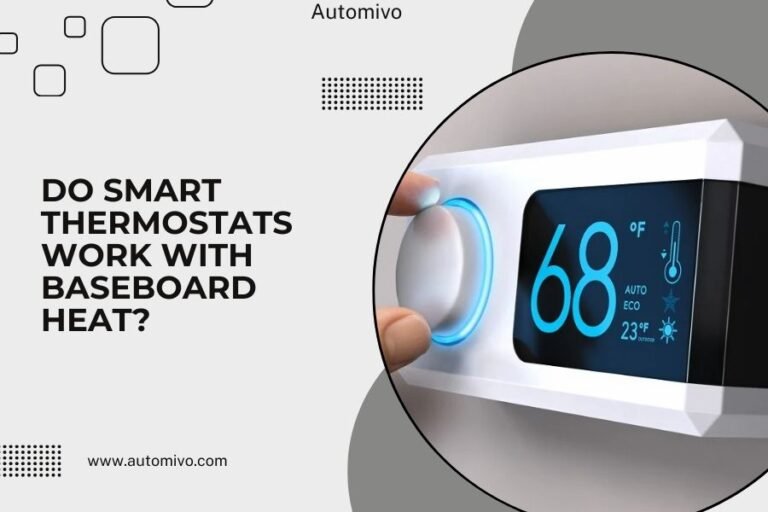
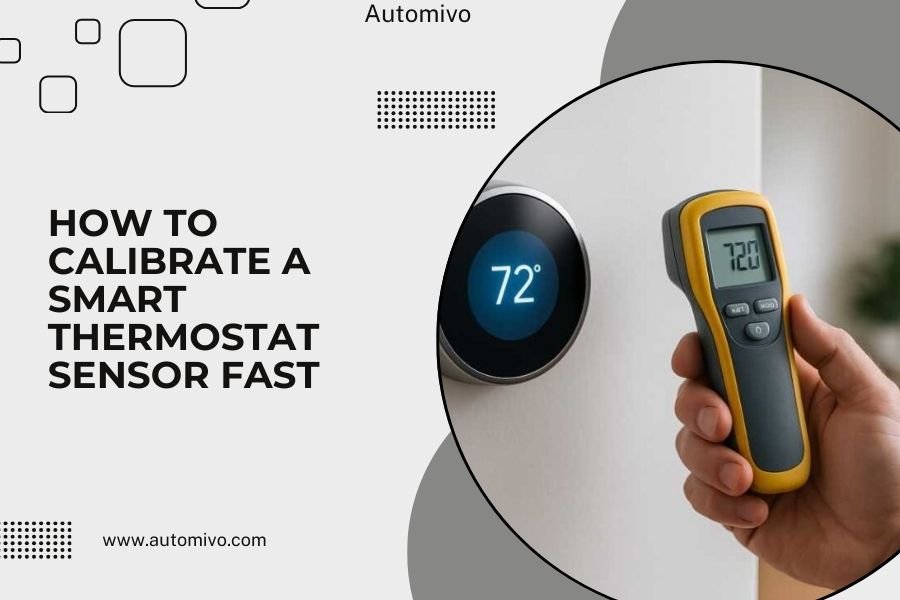
To calibrate your smart thermostat sensor fast, check the temperature offset in your device settings and adjust it by comparing readings with a separate thermometer placed near the sensor.
Most smart thermostats allow sensor calibration through their mobile app or web interface, typically taking just 5-10 minutes to complete.
Quick Steps to Start Calibrating Right Now
Your smart thermostat might be reading the wrong temperature. This happens more often than you’d think. The good news? You can fix it yourself in under 15 minutes.
First, grab a reliable thermometer. Place it within 3 feet of your smart thermostat. Wait 30 minutes for both devices to settle on accurate readings.
Compare the two temperatures. If they’re different by 2 degrees or more, your thermostat needs calibration.
What You’ll Need Before Starting
- A digital thermometer (mercury thermometers work too)
- Your smartphone or computer
- About 10-15 minutes of free time
- Access to your thermostat’s app or settings menu
Why Your Smart Thermostat Sensor Gets Off Track
Smart thermostats are pretty smart, but they’re not perfect. Several things can throw off their temperature readings.
Common Causes of Sensor Drift
Heat sources nearby mess with accuracy. Think lamps, electronics, or direct sunlight. Your thermostat thinks it’s warmer than it really is.
Age also plays a role. I found that most sensors start drifting after 2-3 years of use. It’s just normal wear and tear.
Dust buildup inside the unit can insulate the sensor. This makes readings sluggish and less accurate.
Installation Location Problems
Where you installed your thermostat matters big time. Hallways with poor air circulation give false readings. So do spots near air vents or exterior walls.
The ideal spot? An interior wall about 5 feet from the floor. Away from heat sources and with good air flow.
Step-by-Step Calibration Process
Step 1: Get Baseline Temperature Readings
Place your reference thermometer close to your smart thermostat. Not touching it, but within arm’s reach works fine.
Wait at least 30 minutes. Both devices need time to adjust to room conditions. Don’t rush this step.
Write down both temperatures. This gives you the offset number you’ll need later.
Step 2: Access Your Thermostat Settings
Open your thermostat’s mobile app. Every major brand has one – Nest, Ecobee, Honeywell, you name it.
Look for “Settings,” “Calibration,” or “Temperature Offset” in the menu. Some brands hide this under “Advanced Settings.”
Brand-Specific Menu Locations
Nest thermostats call it “Temperature Correction” under Settings > Technical Info. Ecobee uses “Calibrate” in the main settings menu.
Honeywell puts it under “Preferences” then “Temperature Offset.” Check your manual if you can’t find it.
Step 3: Enter Your Offset Value
Here’s where that temperature difference comes in handy. If your thermostat reads 72°F but your reference thermometer shows 70°F, you need a -2°F offset.
Enter this number in the calibration field. Most systems let you adjust in half-degree increments.
Save the changes. Your thermostat should immediately show the corrected temperature.
Different Calibration Methods by Thermostat Type
| Thermostat Brand | Calibration Access | Adjustment Range |
|---|---|---|
| Google Nest | App Settings Menu | ±9°F |
| Ecobee | Main Settings | ±10°F |
| Honeywell | Preferences | ±5°F |
| Carrier | Advanced Settings | ±6°F |
WiFi vs Non-WiFi Models
WiFi-enabled thermostats make calibration super easy through their apps. You can adjust settings from anywhere in your house.
Non-WiFi smart thermostats require manual button presses on the unit itself. Check your model’s instruction manual for the exact button sequence.
Using the Physical Interface
Most units use a combination of up/down arrows and a menu button. Press and hold the menu button for 3-5 seconds to enter setup mode.
Navigate to temperature calibration using the arrow keys. Adjust the offset and confirm your changes.
Advanced Calibration Techniques
Multi-Point Temperature Testing
Want to be extra thorough? Test calibration at different temperatures throughout the day.
Check readings in the morning when it’s cool, afternoon when it’s warm, and evening as temperatures drop. This shows if your sensor performs consistently.
I found that some older units read accurately at 70°F but drift at higher or lower temperatures. Multi-point testing catches these issues.
Seasonal Calibration Checks
Temperature sensors can shift with seasonal changes. Check calibration when you switch from heating to cooling mode and vice versa.
Humidity changes affect some sensors too. High summer humidity or dry winter air might require small adjustments.
Using External Sensor Data
Many smart thermostats work with remote sensors. These little devices give more accurate whole-house temperature readings.
Place remote sensors in your main living areas. Your thermostat can average their readings for better overall comfort control.
Troubleshooting Common Calibration Issues
Calibration Settings Won’t Save
This usually happens with weak WiFi connections. Move closer to your router and try again.
Low battery levels can also prevent settings from saving. Replace batteries if your unit uses them.
App Connection Problems
Close and reopen your thermostat app. Force-quit it completely, then restart.
Clear the app cache on Android devices. iPhone users should delete and reinstall the app if problems persist.
Temperature Still Reads Wrong After Calibration
Double-check your offset calculation. It’s easy to mix up positive and negative values.
Make sure your reference thermometer is accurate. Test it in a glass of ice water – it should read 32°F.
Sensor Hardware Problems
If calibration doesn’t fix temperature readings, your sensor might be failing. Contact your thermostat manufacturer for warranty replacement options.
Most smart thermostats have 2-5 year warranties that cover sensor defects.
Best Practices for Long-Term Accuracy
Regular Maintenance Schedule
Clean your thermostat every 3-6 months. Use a soft brush to remove dust from vents and sensors.
Check calibration twice yearly when you change HVAC filters. This keeps everything running smoothly.
Environmental Considerations
Keep heat sources away from your thermostat. That includes table lamps, electronics, and direct sunlight.
Good air circulation helps sensors read accurately. Don’t block vents or airflow around the unit.
When to Call a Professional
If temperature readings are off by more than 5 degrees after calibration, call an HVAC tech. This suggests bigger system problems.
Frequent calibration needs (more than twice per year) also indicate hardware issues that need professional attention.
Conclusion
Calibrating your smart thermostat sensor doesn’t have to be complicated. With a simple thermometer and 15 minutes of your time, you can get accurate temperature readings that keep your home comfortable and your energy bills reasonable. Remember to check calibration twice yearly and keep the sensor area clean and unobstructed. If problems persist after calibration, don’t hesitate to contact customer support or an HVAC professional for help.
How often should I calibrate my smart thermostat sensor?
Check calibration every 6 months, typically when changing HVAC filters. Most sensors stay accurate for months at a time, but seasonal changes and normal wear can cause drift.
Can I use my phone’s temperature app instead of a thermometer for calibration?
No, phone temperature sensors are notoriously inaccurate and measure internal device temperature, not room temperature. Always use a dedicated digital or analog thermometer for reliable calibration.
What if my thermostat doesn’t have a calibration option in settings?
Older or basic smart thermostats might not offer user calibration. Contact the manufacturer’s customer support – they may provide calibration instructions or recommend professional service.
Why does my thermostat read differently in summer versus winter?
Humidity changes affect some temperature sensors. High summer humidity can make sensors read slightly higher, while dry winter air might cause lower readings. Seasonal calibration checks help maintain accuracy.
Is it normal for different thermostats in my house to show different temperatures?
Yes, temperature varies throughout homes due to airflow, sun exposure, and room usage. Differences of 2-3 degrees between floors or rooms are normal, but thermostats in the same area should read similarly.