To remove a smart thermostat before moving, turn off power at the circuit breaker, disconnect wires carefully while labeling them, and unscrew the mounting plate from the wall.
You’ll need basic tools like a screwdriver and wire nuts, plus about 30 minutes to safely complete the smart thermostat removal process.
Why You Should Remove Your Smart Thermostat
Moving to a new place? Your smart thermostat doesn’t have to stay behind. These devices cost anywhere from $100 to $500, so taking yours makes financial sense.
Smart thermostats also contain your personal data. WiFi passwords, schedules, and usage patterns stay stored in memory. You don’t want the next homeowner accessing your information.
Plus, your new home might need climate control upgrades. Why not bring the thermostat you already know how to use?
What You’ll Need Before Starting
Gather these tools before you begin:
- Phillips head screwdriver
- Flathead screwdriver
- Wire nuts or electrical tape
- Phone camera for photos
- Small labels or masking tape
- Needle-nose pliers (optional)
The whole process takes about 30 minutes. Don’t rush it. One mistake could damage your thermostat or create electrical issues.
Safety First: Turn Off the Power
Find your home’s electrical panel. Look for the breaker labeled “HVAC,” “Heating,” or “Air Conditioning.” Flip it to the OFF position.
Can’t find the right breaker? Turn off the main power switch temporarily. Better safe than sorry when dealing with electrical wires.
Wait 5 minutes after turning off power. This gives the system time to fully shut down. Some thermostats have backup batteries that need to drain.
Double-Check the Power Is Off
Touch your thermostat screen. If it’s completely dark and unresponsive, you’re good to go. Still showing anything? Go back and check your breakers again.
I found that many smart thermostats have internal batteries. The screen might stay on briefly even with power off. That’s normal.
Document Everything Before Disconnecting
Take photos of your wiring setup. Snap pictures from multiple angles. These photos will save you hours of frustration during reinstallation.
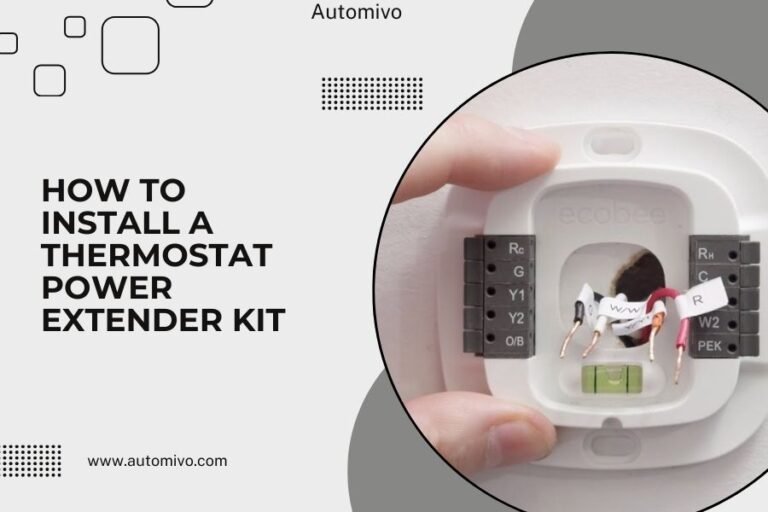
Look at the wire labels on your thermostat. Common labels include R, W, Y, G, and C. Each wire connects to a specific terminal.
Write down which colored wire goes to which terminal. Red usually goes to R (power), white to W (heat), yellow to Y (cooling), and green to G (fan).
The C-Wire Mystery
Many homes have a blue or black C-wire (common wire). This provides constant power to smart thermostats. Some older homes don’t have this wire.
If you see a C-wire connected, make sure to note its color and location. You’ll need this information for your new home installation.
Remove the Thermostat Display
Most smart thermostats have a removable display that pulls straight off the wall plate. Gently pull the display toward you.
Some models have a release button or tab. Check your thermostat manual if the display won’t budge with gentle pressure.
Set the display aside in a safe place. The wall plate underneath contains all the wire connections.
Handle the Display Carefully
Smart thermostat displays contain delicate electronics. Don’t drop them or expose them to extreme temperatures.
Wrap the display in a soft cloth or bubble wrap for moving. Store it in the original box if you still have it.
Disconnect the Wires Properly
Now comes the most important step. Loosen each wire terminal screw with your screwdriver. Don’t remove the screws completely – just loosen them enough to pull out the wires.
Remove one wire at a time. As you disconnect each wire, wrap a piece of tape around it with the terminal letter written on it.
For example, if the red wire was connected to the R terminal, wrap tape around the red wire and write “R” on the tape.
Dealing with Wire Nuts
Some installations use wire nuts instead of direct terminal connections. Unscrew the wire nuts counterclockwise to separate the wires.
Keep the wire nuts in a small bag. You might need them for reinstallation.
What If Wires Fall Into the Wall?
Sometimes wires slip back into the wall opening. Don’t panic. Use needle-nose pliers to carefully pull them back out.
If a wire breaks or gets damaged, you’ll need an electrician to run new thermostat wire. This is rare but can happen in older homes.
Remove the Wall Plate
With all wires disconnected, unscrew the wall plate from the wall. Most plates attach with 2-4 screws.
Keep these screws in a small container. You’ll need them for installation at your new home.
The wall plate might have drywall anchors behind it. These usually stay in the wall.
Clean Up the Wall
Remove any remaining drywall anchors or wall plugs. Fill small holes with spackling compound.
Your lease or sale contract might require you to patch and paint. Check your agreements before assuming you can leave holes.
Secure the Loose Wires
Bundle the loose thermostat wires together with electrical tape. This prevents them from falling back into the wall.
Leave about 6 inches of wire sticking out. The next homeowner or their HVAC technician will need this length for installation.
Consider capping each wire with a wire nut for added safety. This prevents accidental contact when power gets restored.
Label the Wire Bundle
Attach a note to the wire bundle explaining what you removed. Include your thermostat model if possible.
This small courtesy helps the next person understand the existing wiring setup.
Pack Your Thermostat for Moving
Store all components together in one box. Include the display, wall plate, screws, and any included accessories.
Print out installation instructions or save them to your phone. Many manufacturers provide downloadable manuals online.
Pack any original accessories like wire labels, trim rings, or mounting hardware. These small parts are easy to lose during moves.
Don’t Forget the Manual
Keep your thermostat manual or write down the model number. You’ll need this information for reinstallation help.
Many smart thermostat apps also store installation guides. Make sure you can access these after moving.
Common Removal Mistakes to Avoid
Don’t rush the wire labeling process. Mixed-up wires cause most reinstallation problems.
Never work with power on. Even low-voltage thermostat wires can cause equipment damage if connected incorrectly.
Avoid yanking on wires. Pull gently and straight out to prevent breaks inside the wall.
The Photo Documentation Rule
Take more photos than you think you need. Different angles show details you might miss in a single shot.
Photos help more than written notes when you’re trying to remember wire positions months later.
Save Photos in Multiple Places
Email the photos to yourself. Save them to cloud storage. Phone storage can fail right when you need those pictures most.
Installing at Your New Home
Research shows that most smart thermostats work in multiple homes (Consumer Reports). Your thermostat should install fine in your new place.
Check the existing wire setup at your new home first. You need at least 4 wires for most smart thermostats to work properly.
If your new home has different wiring, you might need professional help. HVAC technicians can add missing wires or install power adapters.
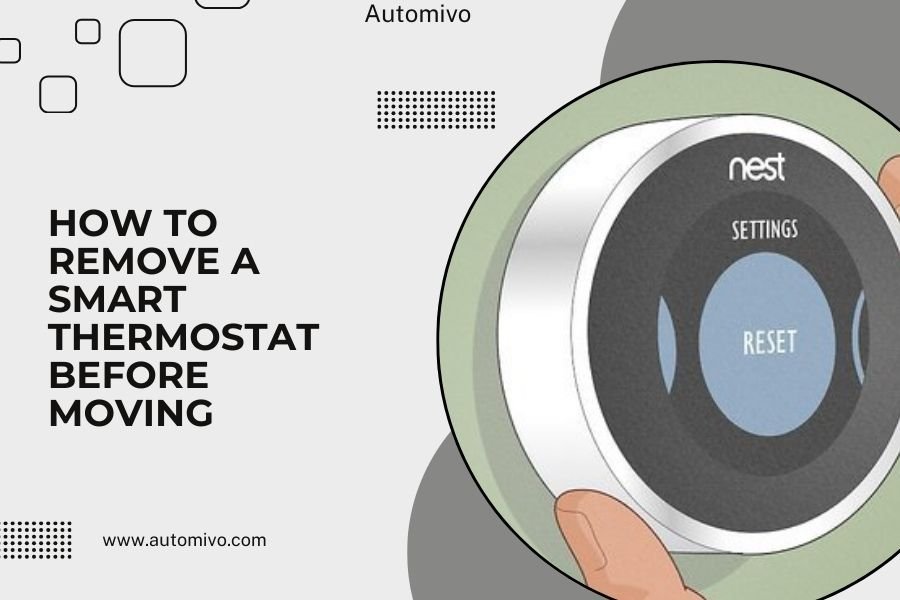
Reset Your Thermostat
Perform a factory reset before installing in your new home. This clears old WiFi settings and schedules.
Most thermostats reset by holding down specific button combinations. Check your manual for the exact steps.
Set Up New WiFi Connections
You’ll need to reconnect to your new home’s WiFi network. Have your network name and password ready during setup.
Download any required apps on your phone before starting installation. This speeds up the connection process.
When to Call a Professional
Consider hiring an HVAC technician if your new home has unusual wiring. Some homes have multi-stage heating systems or zone controls.
Call a pro if you see more than 8 wires at either location. Complex systems need expert knowledge to wire correctly.
Also get help if you’re not comfortable working with electrical connections. The service call cost beats replacing damaged equipment.
Cost Considerations
Professional thermostat installation typically costs $100-200. Removal services cost about the same amount.
Compare this to buying a new smart thermostat ($150-500). DIY removal and installation saves significant money.
| Option | Cost Range | Time Required |
|---|---|---|
| DIY Removal | Free | 30 minutes |
| Professional Removal | $100-200 | 1 hour |
| Buy New Thermostat | $150-500 | Setup time |
Conclusion
Removing your smart thermostat before moving is straightforward with proper preparation. Turn off power, document your wiring setup, disconnect carefully, and pack everything together.
The 30 minutes you spend removing your thermostat can save hundreds of dollars. Plus, you get to keep using the device you already know and love.
Take your time with the wiring documentation. Good photos and wire labels make reinstallation much easier. When in doubt, call a professional rather than risk damaging expensive equipment.
Your smart thermostat is an investment worth protecting. With these steps, you can safely move it to your new home and continue enjoying automated climate control.
Can I remove a smart thermostat without turning off power?
No, always turn off power at the circuit breaker before removing any thermostat. Even low-voltage wires can cause equipment damage or personal injury if handled incorrectly with power on.
What happens to my thermostat settings when I remove it?
Most smart thermostats store settings in internal memory and cloud accounts. Your schedules and preferences should remain available when you reinstall the device, though you’ll need to reconnect to WiFi.
Do I need special permits to remove a thermostat?
No permits are required for thermostat removal in most areas. This is considered basic maintenance, not electrical work requiring licenses. Check local codes if you’re unsure about your specific location.
What if my new home doesn’t have a C-wire for my smart thermostat?
You can install a C-wire adapter, use a power extender kit, or have an electrician run new thermostat cable. Many smart thermostats include adapter kits for homes without C-wires.
Should I leave the old thermostat for the new homeowner?
Only if it’s specifically mentioned in your sales contract or lease agreement. Smart thermostats are personal property that you can take with you, just like other electronics and appliances you purchased.