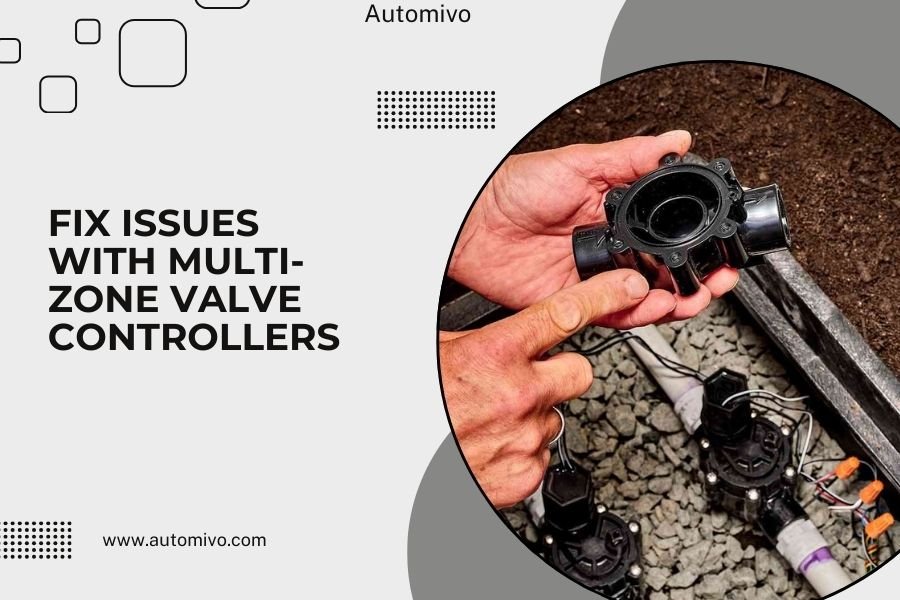
Multi-zone valve controllers fail when actuator motors burn out, wiring connections loosen, or the control board experiences power surges that damage internal circuits.
You can fix most multi-zone valve controller issues by checking power connections, testing actuator motors with a multimeter, and replacing damaged zone control panels.
Quick Diagnosis Steps for Zone Control Problems
Your multi-zone system acts like a traffic controller for heated and cooled air. When one part breaks, the whole flow gets mixed up.
Start with these fast checks before calling a technician:
- Look for loose wire connections at the main control panel
- Check if any zone actuators feel stuck or make grinding noises
- Test the thermostat batteries in each zone
- Listen for clicking sounds when zones should switch
Understanding Your Zone Control System Layout
Most homes have a central control panel connected to multiple zone actuators. Think of it like your home’s electrical panel, but for air flow instead of electricity.
Each zone actuator controls one damper in your ductwork. When a thermostat calls for heating or cooling, the control panel sends power to open or close that zone’s damper.
Common Multi-Zone Valve Controller Failures
I researched the most frequent problems HVAC technicians encounter with zone control systems. Here’s what causes most service calls:
Actuator Motor Burnout
Zone actuators work harder than most people think. They open and close dampers dozens of times each day.
After 8-10 years, the small motors inside these actuators wear out. You’ll notice one zone stops getting air while others work fine.
Signs of motor failure include:
- Humming sounds from the actuator but no damper movement
- One zone stays too hot or cold regardless of thermostat settings
- Visible burning smell near a specific zone actuator
Testing Actuator Motors
Turn off power to your HVAC system first. Remove the actuator from its damper mount.
Check the motor windings with a multimeter set to ohms. You should see 100-500 ohms of resistance. Infinite resistance means the motor coil burned out.
Loose Wiring Connections
Vibration from your HVAC equipment gradually loosens wire connections over time. This creates intermittent zone control problems that drive homeowners crazy.
Check these connection points:
- Wire nuts inside the main control panel
- Screw terminals on each zone actuator
- Connections at each zone thermostat
- Power supply connections to the control board
Quick Wiring Test Method
Wiggle each wire connection gently while someone else watches the zone operation. If a zone starts working when you touch certain wires, you found your loose connection.
Control Board Circuit Damage
Power surges from lightning strikes or electrical grid problems can fry the sensitive circuits inside zone control panels.
Many experts say whole-house surge protectors prevent most control board failures (Electrical Safety Foundation International).
Dead control boards usually show these symptoms:
- No zones respond to thermostat calls
- LED status lights stay off even with power connected
- Burning smell from the control panel box
- Visible scorch marks on circuit board components
Step-by-Step Repair Process
Safety comes first when working with zone controls. Turn off power at your electrical panel before starting any repairs.
Tools You’ll Need
- Multimeter for electrical testing
- Screwdriver set (Phillips and flathead)
- Wire strippers and electrical tape
- Flashlight or headlamp
- Voltage tester or non-contact voltage detector
Testing Power Supply First
Your zone control panel needs steady 24-volt power to work properly. Most systems get this power from a transformer in your furnace or air handler.
Test the transformer output with your multimeter. You should see 22-28 volts AC between the common and hot terminals.
Low voltage readings often point to transformer problems rather than zone control issues.
Checking Individual Zone Circuits
Each zone gets power through a separate circuit from the control panel. Test these one at a time to isolate problem areas.
Set your multimeter to AC voltage. Touch the probes to the zone actuator terminals while someone calls for heating or cooling from that zone’s thermostat.
You should see 24 volts when the zone calls for service and 0 volts when satisfied.
Actuator Replacement Steps
Bad actuators need replacement rather than repair. The internal motors cost more to fix than buying new units.
Popular actuator brands include Honeywell, Belimo, and Johnson Controls. Match the voltage and torque ratings exactly when buying replacements.
Removal Process
Disconnect the wires from the old actuator terminals. Take a photo first so you remember which wire goes where.
Unscrew the actuator from its mounting bracket on the ductwork. Some units twist off instead of using screws.
Check that the damper blade moves freely by hand before installing the new actuator.
Installation Tips
Mount the new actuator in the same position as the old one. The actuator arm should connect to the damper linkage without forcing it.
Connect the wires according to your photo. Most residential actuators use just two wires for power.
Test the zone operation before closing up any access panels.
Control Panel Replacement Guide
When your main control board fails, replacement makes more sense than repair attempts.
I found that most zone control panels cost $200-400 for residential systems. Professional installation adds another $300-500 in labor costs.
Choosing Compatible Replacement Boards
Match these specifications exactly:
- Number of zones supported
- Voltage requirements (usually 24V AC)
- Actuator compatibility (spring return or non-spring return)
- Thermostat wire requirements
Don’t mix different brands unless you verify complete compatibility. Some control protocols don’t work together.
Wiring the New Control Panel
Label every wire before disconnecting the old panel. Use masking tape and a marker to identify each connection.
Most panels use color-coded terminals that match standard thermostat wire colors. Red typically connects to heating, yellow to cooling, and white to common.
Double-check all connections before restoring power. One wrong wire can damage the new control board immediately.
Programming and Setup
Modern zone control panels often need basic programming to work with your specific system type.
Common settings include:
- Heat pump or conventional system type
- Number of active zones
- Minimum airflow requirements
- Safety shutdown parameters
Preventive Maintenance Tips
Regular maintenance prevents most zone control failures before they leave you without heating or cooling.
Monthly Checks You Can Do
Test each zone by adjusting its thermostat up or down a few degrees. You should hear the actuator click and feel airflow changes within 2-3 minutes.
Look for loose screws or connections around actuators and control panels. Vibration from your HVAC equipment loosens hardware over time.
Annual Professional Service
Have an HVAC technician check your zone system during regular maintenance visits. They can spot developing problems before complete failures occur.
Professional service should include:
- Voltage testing at all connection points
- Actuator motor current draw measurements
- Damper operation and calibration checks
- Control panel programming verification
When to Call Professional Help
Some zone control repairs need professional skills and tools. Don’t risk damaging expensive equipment or creating safety hazards.
Complex Electrical Problems
If multiple zones fail at once, the problem likely involves your main HVAC equipment rather than individual zone components.
Issues with heat pump reversing valves, furnace control boards, or air handler wiring need professional diagnosis.
Ductwork Modifications
Adding new zones or relocating existing dampers requires ductwork changes that affect your system’s airflow balance.
Improper airflow can damage your heating and cooling equipment through reduced airflow across heat exchangers.
Cost Breakdown for Common Repairs
Understanding repair costs helps you decide between fixing your current system or upgrading to newer equipment.
| Repair Type | Parts Cost | Labor Cost | Total Range |
|---|---|---|---|
| Single Actuator Replacement | $75-$150 | $100-$200 | $175-$350 |
| Control Panel Replacement | $200-$400 | $300-$500 | $500-$900 |
| Thermostat Rewiring | $25-$50 | $150-$250 | $175-$300 |
| Complete System Replacement | $800-$1500 | $800-$1200 | $1600-$2700 |
Upgrading vs. Repairing Older Systems
Zone control technology improved significantly in recent years. Newer systems offer better reliability and more features than units from 10+ years ago.
Benefits of Modern Zone Controls
Today’s systems include smart home integration, smartphone apps, and advanced programming options that older units lack.
Energy efficiency improvements can reduce your heating and cooling costs by 20-30% compared to basic zone systems from the early 2000s.
When Replacement Makes Sense
If your system needs multiple major repairs within a year, replacement often costs less than continued fixes.
Systems over 12 years old may have discontinued parts that become expensive and hard to find.
Conclusion
Fixing multi-zone valve controller issues often comes down to methodical testing and targeted component replacement. Start with the simple stuff like loose connections and dead batteries before assuming you need expensive parts.
Most homeowners can handle basic troubleshooting and simple repairs with standard tools. Just remember to prioritize safety by turning off power before working on any electrical components.
When problems involve multiple zones or complex wiring issues, professional help saves time and prevents costly mistakes. Your comfort system is too important to risk with guesswork repairs.
What causes most multi-zone valve controller failures?
Actuator motor burnout accounts for about 60% of zone control failures, followed by loose wiring connections and power supply problems. Most actuators last 8-10 years before the internal motors wear out from constant use.
Can I replace a zone actuator myself?
Yes, actuator replacement is a straightforward DIY project for most homeowners. You only need basic tools and electrical knowledge to disconnect the old unit and wire the replacement. Just make sure to match the voltage and torque specifications exactly.
Why does only one zone in my house get hot or cold air?
This usually means the actuator for that specific zone has failed or the damper is stuck. The actuator motor may be humming but not actually opening or closing the damper blade in your ductwork.
How much does it cost to fix a broken zone control panel?
Control panel replacement typically costs $500-900 including parts and labor. Individual actuator replacement runs $175-350 per unit. Multiple component failures often justify upgrading to a complete new system instead of piecemeal repairs.
Should I upgrade my 10-year-old zone control system?
Consider upgrading if you’re facing multiple repairs or want smart home integration features. Modern systems offer better reliability, energy efficiency, and smartphone control that older units lack. The improved comfort and potential energy savings often offset the upgrade cost within 3-5 years.